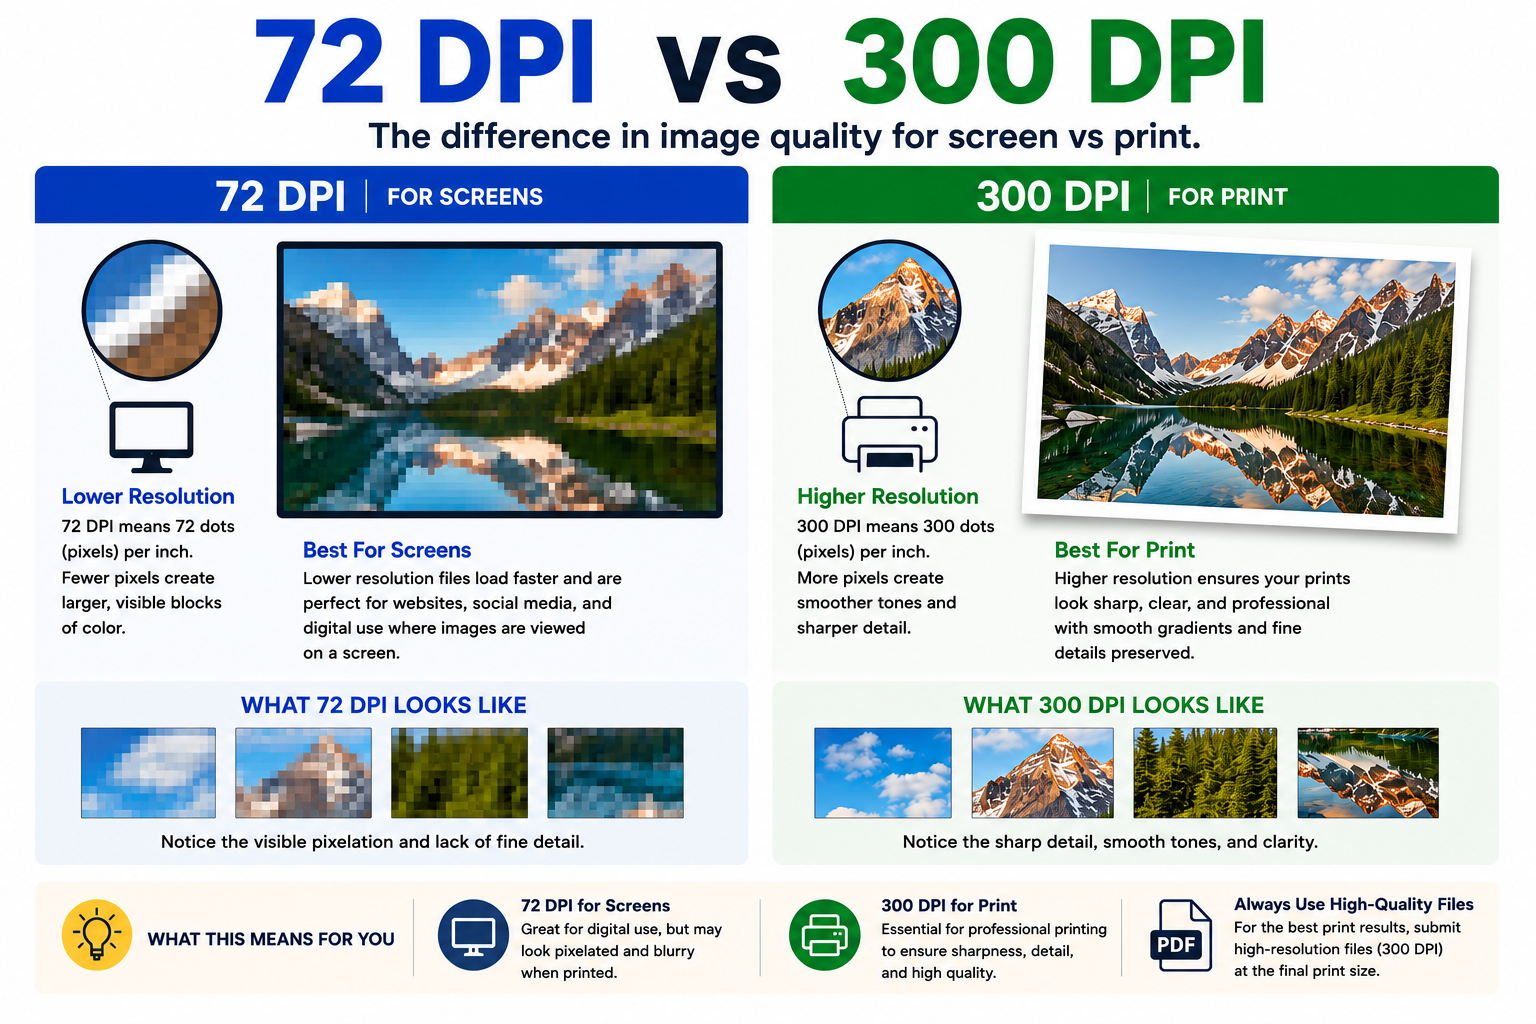
72 DPI vs. 300 DPI: Why Resolution Matters in Print
One of the biggest mistakes people make when preparing artwork for print is assuming that if an image looks good on a screen, it will automatically print clearly at a large size.
Unfortunately, that is not how image resolution works.
A file that appears perfectly sharp on a phone, social media post, or website can quickly become blurry, pixelated, or soft once it is enlarged for printing. That is where DPI comes in.
What Does DPI Mean?
DPI stands for “dots per inch.”
In simple terms, DPI measures how much detail exists within an image. The higher the DPI, the more image information is packed into each inch of the file.
Higher DPI equals:
- sharper detail
- smoother gradients
- cleaner text
- better print quality
Lower DPI usually results in:
- blurry images
- visible pixels
- jagged edges
- soft details
- poor print quality
The Difference Between 72 DPI and 300 DPI
72 DPI:
72 DPI is considered low resolution.
This resolution is commonly used for:
- websites
- social media
- email graphics
- digital presentations
- screen viewing
Files created at 72 DPI are optimized for monitors and mobile devices because screens do not require extremely high detail to look sharp.
The benefit of 72 DPI is smaller file sizes and faster loading times online.
However, once these files are enlarged for print, the lack of image data becomes obvious.
You may notice:
- pixelation
- blurry edges
- muddy details
- poor image clarity
- distorted text and graphics
This becomes especially noticeable in:
- banners
- posters
- signs
- trade show graphics
- vehicle wraps
- wall murals
300 DPI
300 DPI is considered high resolution and is the industry standard for professional print quality.
At 300 DPI, images contain significantly more detail, allowing prints to appear:
- sharp
- clean
- smooth
- professional
This higher resolution preserves:
- textures
- fine details
- gradients
- shadows
- image clarity
That is why print shops almost always recommend 300 DPI files whenever possible.
Why Images Look Fine on a Screen but Print Poorly
Screens display images differently than printers.
A monitor only shows an image at the physical size of the display itself. Even a lower resolution image can appear acceptable on a small screen because it is not being enlarged very much.
Printing is different.
When you print a file, especially at large format sizes, the image must physically stretch across real dimensions. If the image does not contain enough resolution, the printer cannot create missing detail.
Instead, it enlarges the existing pixels.
That is what causes the blocky or blurry appearance commonly associated with low resolution graphics.
Viewing Distance Matters
Not every print project requires 300 DPI.
Viewing distance plays a major role in determining acceptable resolution.
For example:
- Business cards and brochures are viewed up close and require very high detail
- Billboards are viewed from hundreds of feet away and can use lower resolution files
- Vehicle wraps often use lower effective DPI because they are rarely viewed inches away
However, for most standard print projects, designing at 300 DPI remains the safest and most reliable option.
How to Check the Resolution of an Image
Many clients are unsure whether their image is high enough quality for print. Fortunately, checking resolution is fairly simple.
On Windows
- Right click the image
- Select “Properties”
- Click the “Details” tab
- Look for image dimensions and DPI information
On Mac
- Open the image in Preview
- Click “Tools”
- Select “Show Inspector”
- Review the image dimensions and resolution
In Photoshop
- Open the image
- Go to:
Image → Image Size - Check:
- Width and height
- Resolution (DPI)
- Pixel dimensions
This is one of the most accurate ways to evaluate whether an image is suitable for printing.
Pixel Dimensions Matter Too
DPI alone does not tell the full story.
An image may technically say “300 DPI” but still be too small to print clearly at a large size.
For example:
- A 1000 × 1000 pixel image can only print so large before quality suffers
- Enlarging a small image does not create real detail
- Stretching low resolution artwork usually reduces sharpness even further
That is why both DPI and pixel dimensions are important.
Can You Increase Resolution?
Sometimes, but with limitations.
Increasing resolution artificially through software can help slightly, but it cannot fully recreate detail that was never there originally.
Upscaling tools and AI enhancement software may improve appearance in some situations, but they are not a replacement for genuine high resolution artwork.
Whenever possible, always start with the highest quality original file available.
Best Practices for Print-Ready Images
For the best printing results:
- Design at 300 DPI whenever possible
- Create artwork at final print size
- Use high resolution original images
- Avoid screenshots or downloaded social media images
- Save print files as high-quality PDFs
- Keep artwork in CMYK color mode for print production
Final Thoughts
Resolution is one of the most important factors in professional printing.
A low resolution file may look acceptable on a screen, but once enlarged for print, flaws become impossible to ignore. Sharp, professional graphics start with properly prepared high resolution artwork.
When in doubt, it is always better to start with more image quality than less.
Your final print can only be as sharp as the file you provide.

Leave A Reply